Process of Dealer Portal
After logging in, a dashboard will appear as the landing page.
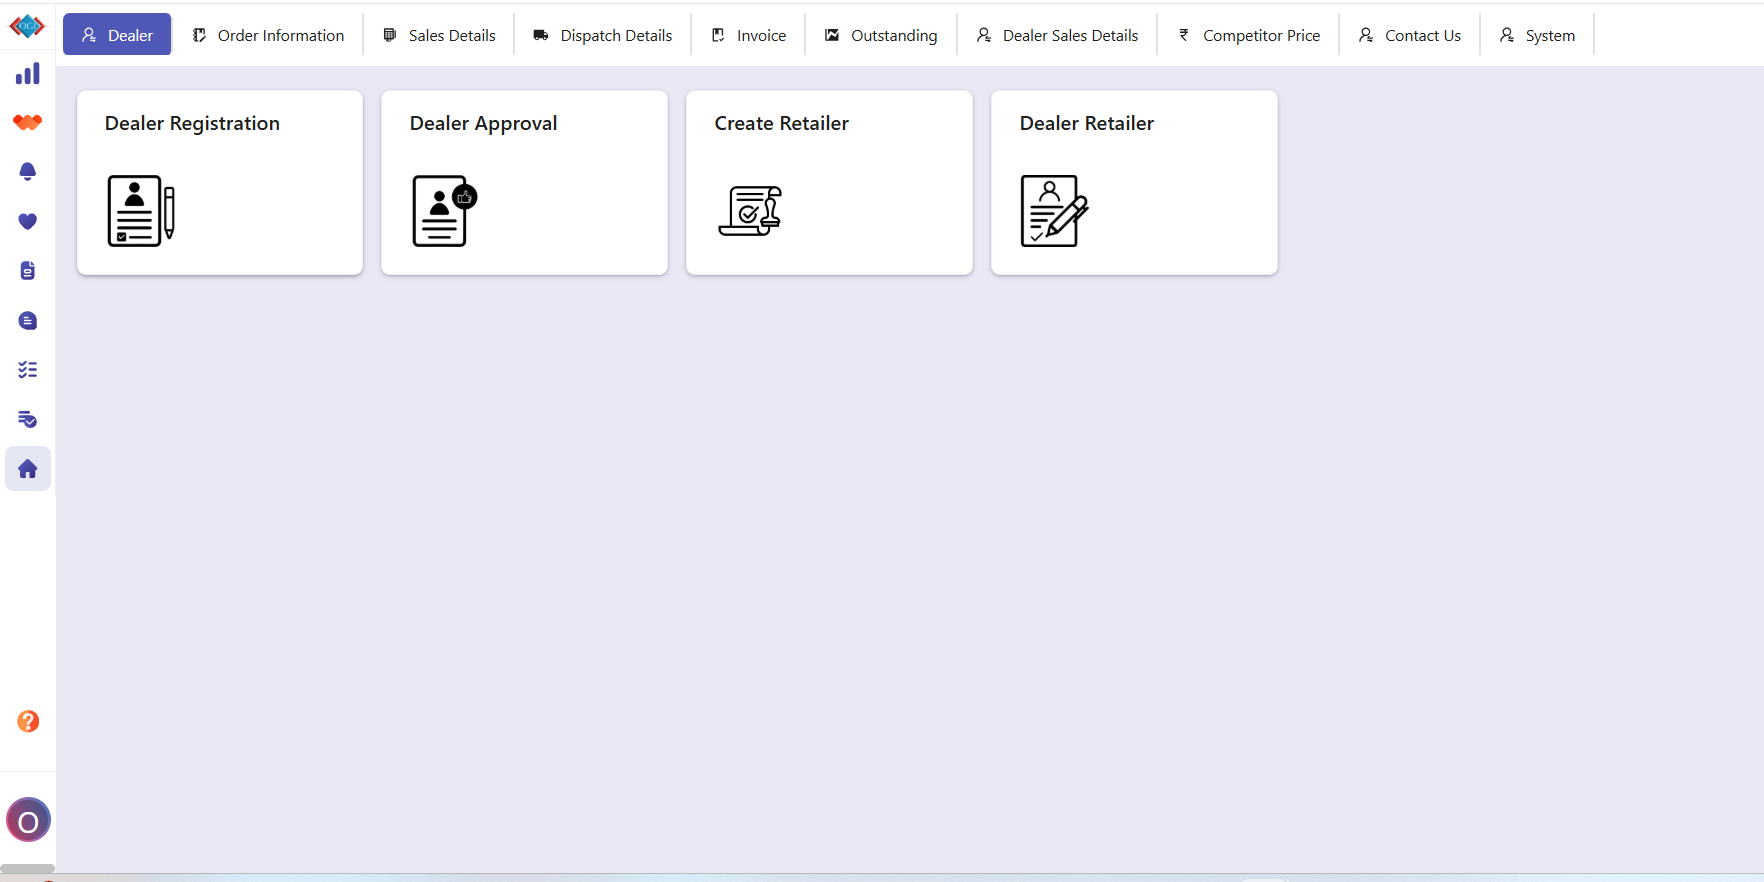
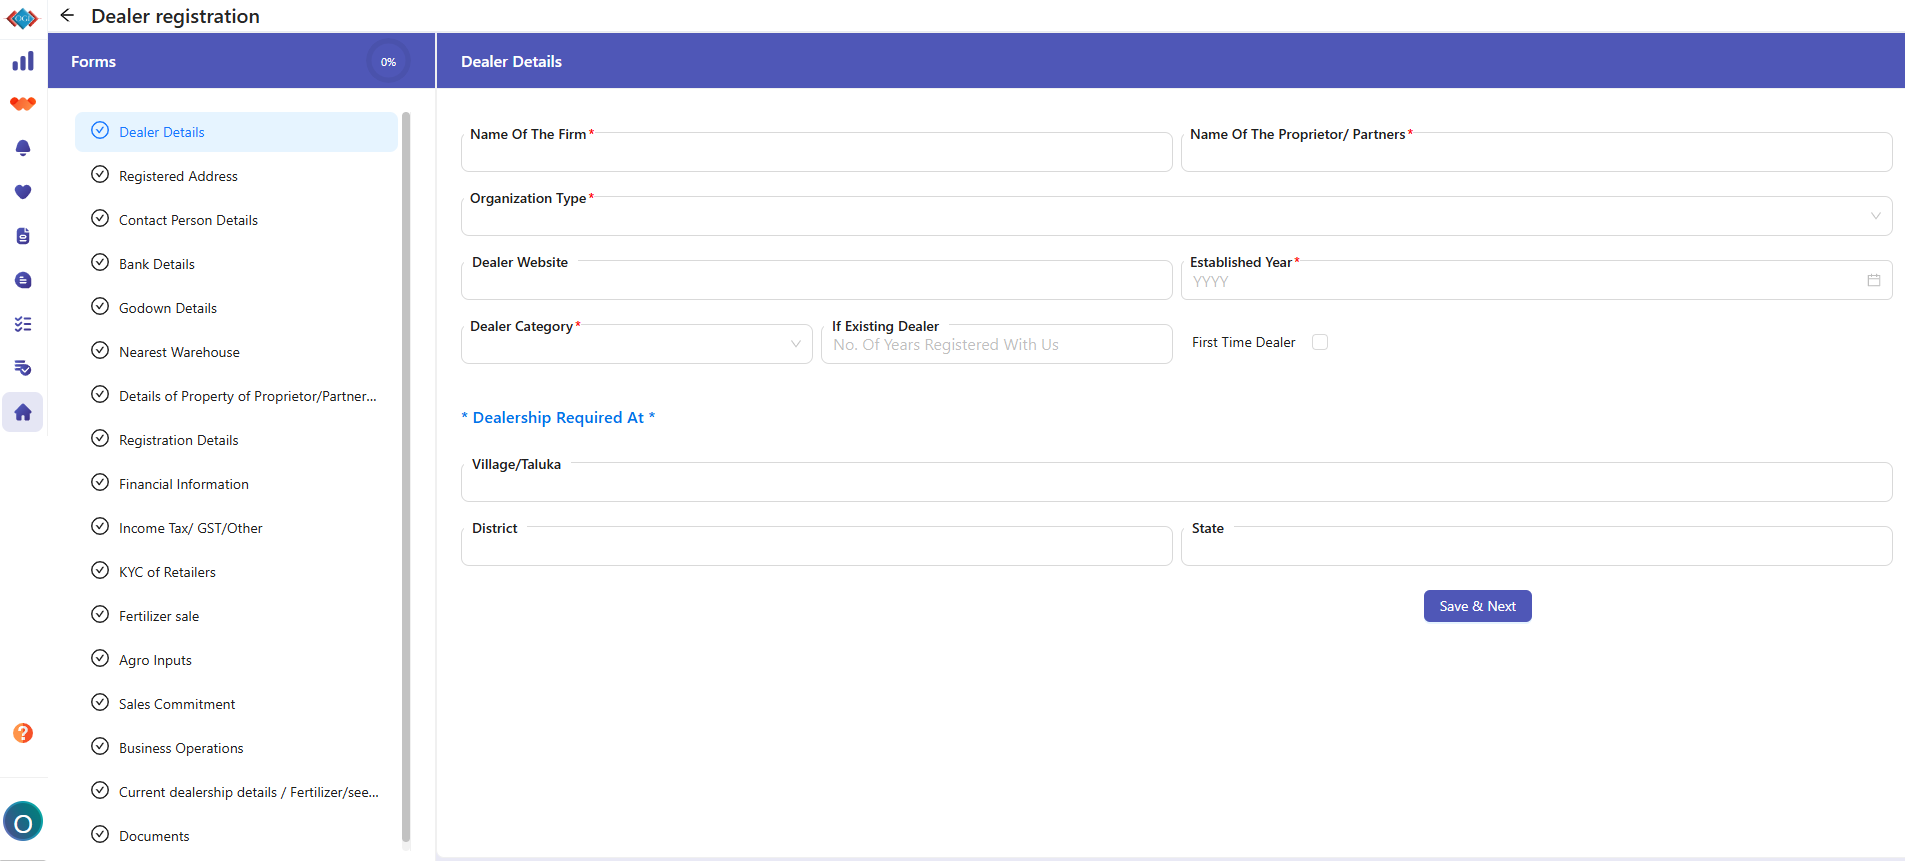
Dealer registration
Information:
- This Process is integrated with SAP.
- There is 2-way connectivity SAP to Hoicko and vise .
- If the Dealer registered in SAP itwill replicate in the Portal.
- And If Dealer Registered the portal after confirmation ofapproval it will become part of SAP.

Process to fill the form:
- The registration process onPortal can be done by Dealer aswell as Administrator.
- Fill the required field and Uploadall necessary documents.
- Submit the entire form, and it will be sent to the Admin.
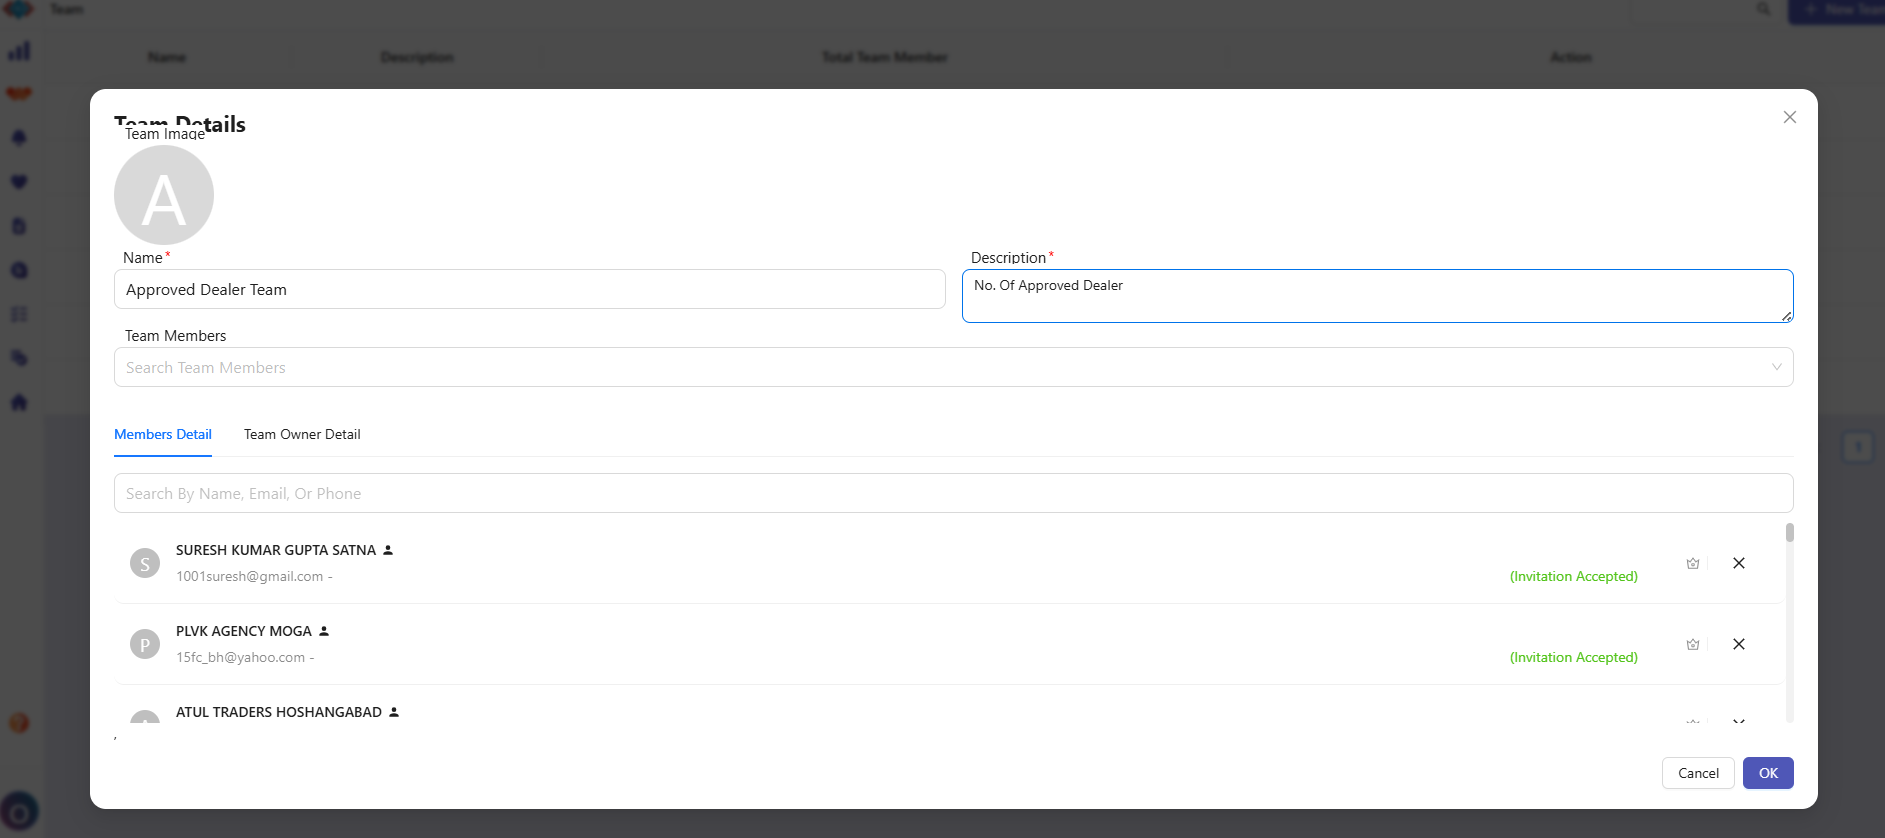
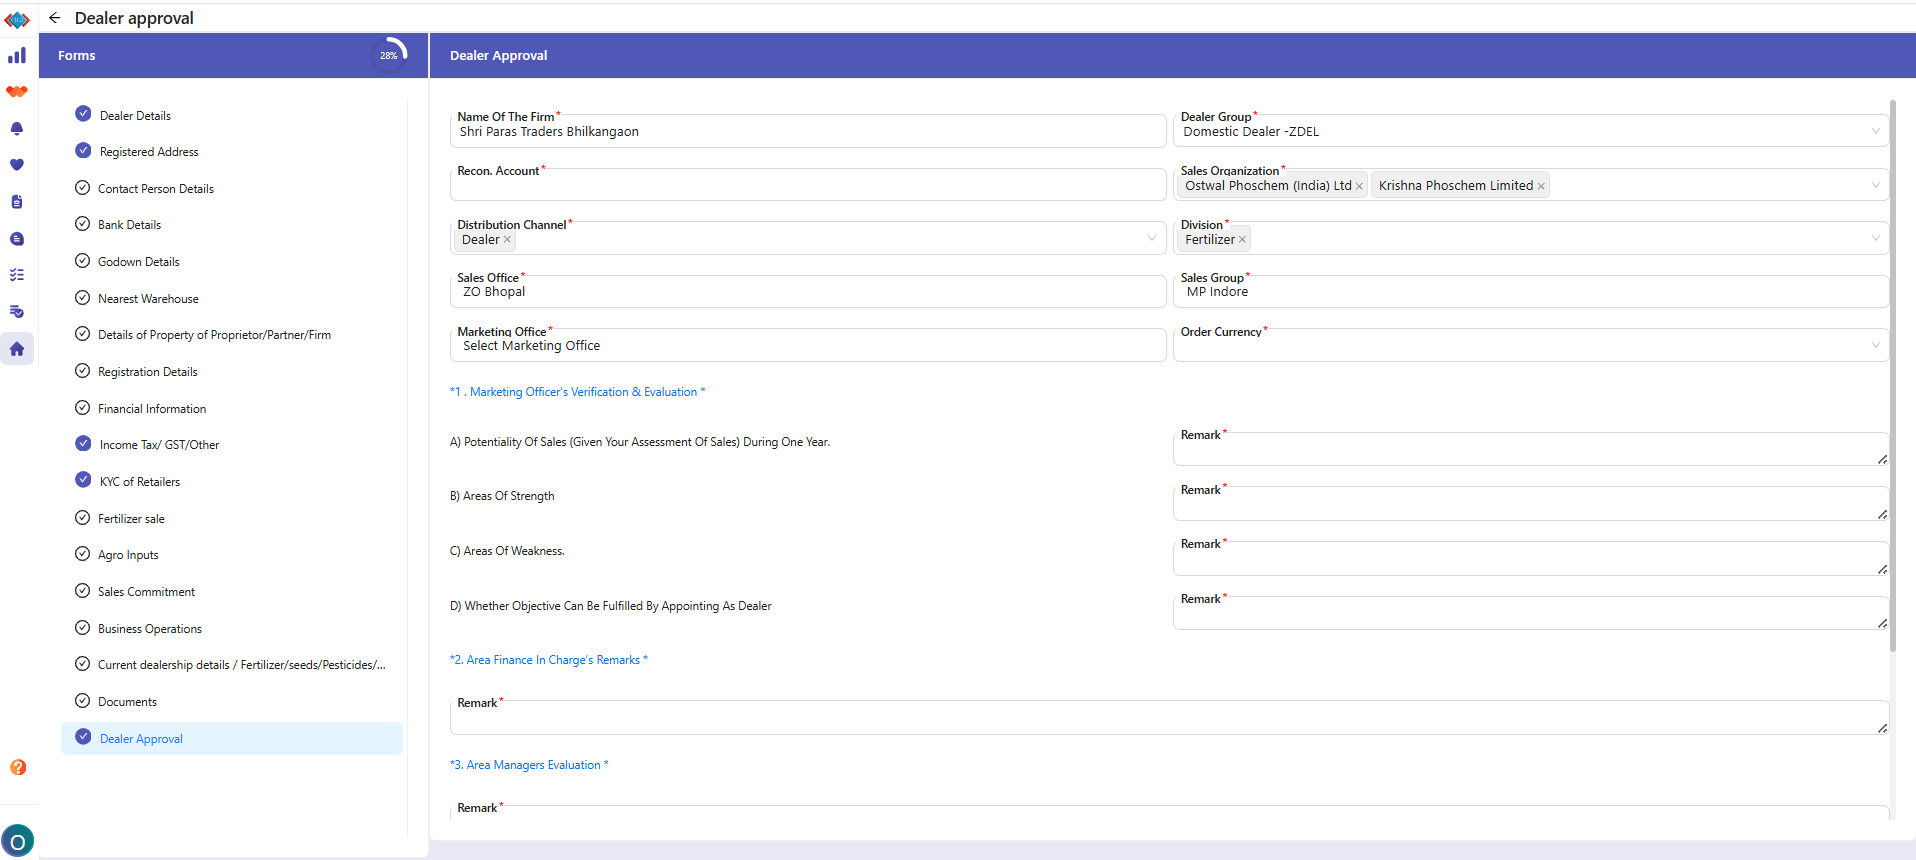
Dealer Approval Process:
-
Add the Dealer in the “Approved Dealer Team.”
-
Then Go to the Home.
-
Click on the Dealer View select Dealer Approval Tile.
-
This Process can be done byAdmin Only.
-
Admin selects the Dealer.
-
Select Dealer Approval and fill in the necessary details, click on the disclaimer checkbox, select Approval 1 Approval 2, and then send it for approval.
-
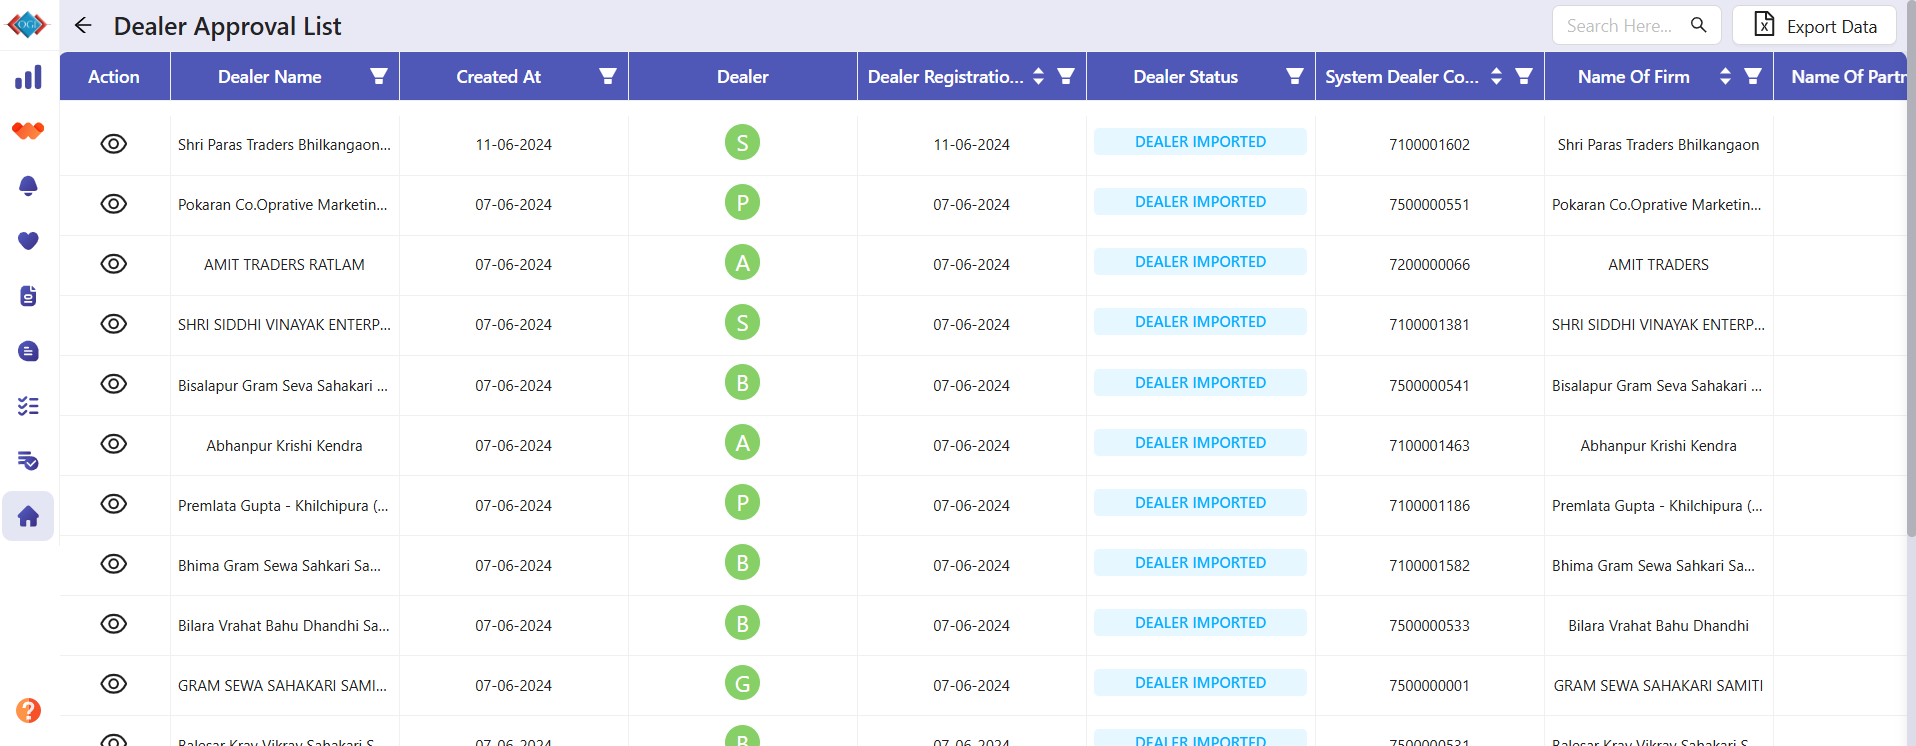
Once the Dealer approved from theboth approval then the Dealer Statusshow Approved, Till it showunapproved dealer.
-
Or If the dealer is imported from SAP itshows Dealer Imported.
-
Once the Dealer Approved, it’s sent to SAP and a Dealer code is generated.
-
This Dealer code will show against thedealer on the Portal
This is how the dealer onboarding and approval process is done.
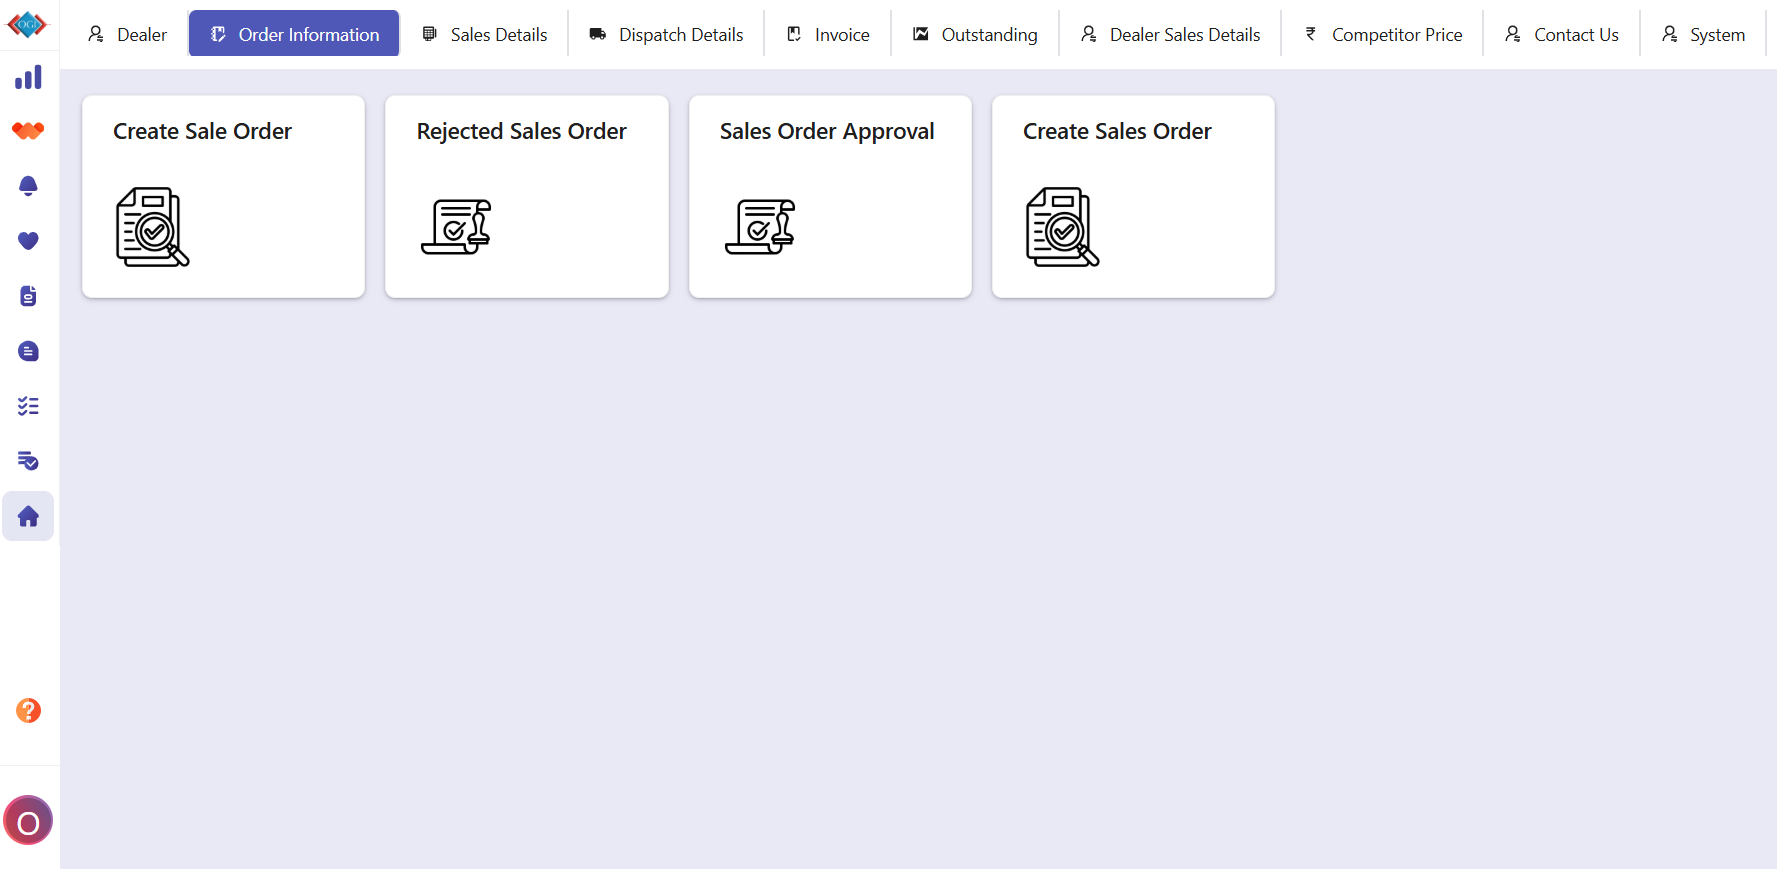
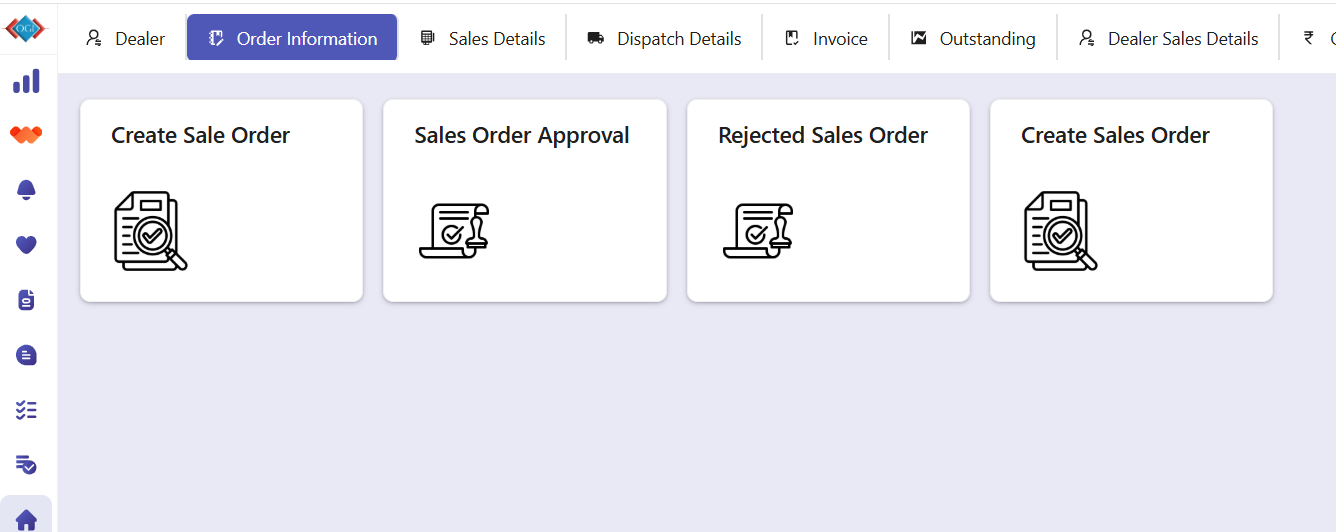
Sales Order Creation.
Information:
-
The Order can be created by the admin and dealer.
-
And admin can see the all views andtiles, where Dealer have limitedpermission.
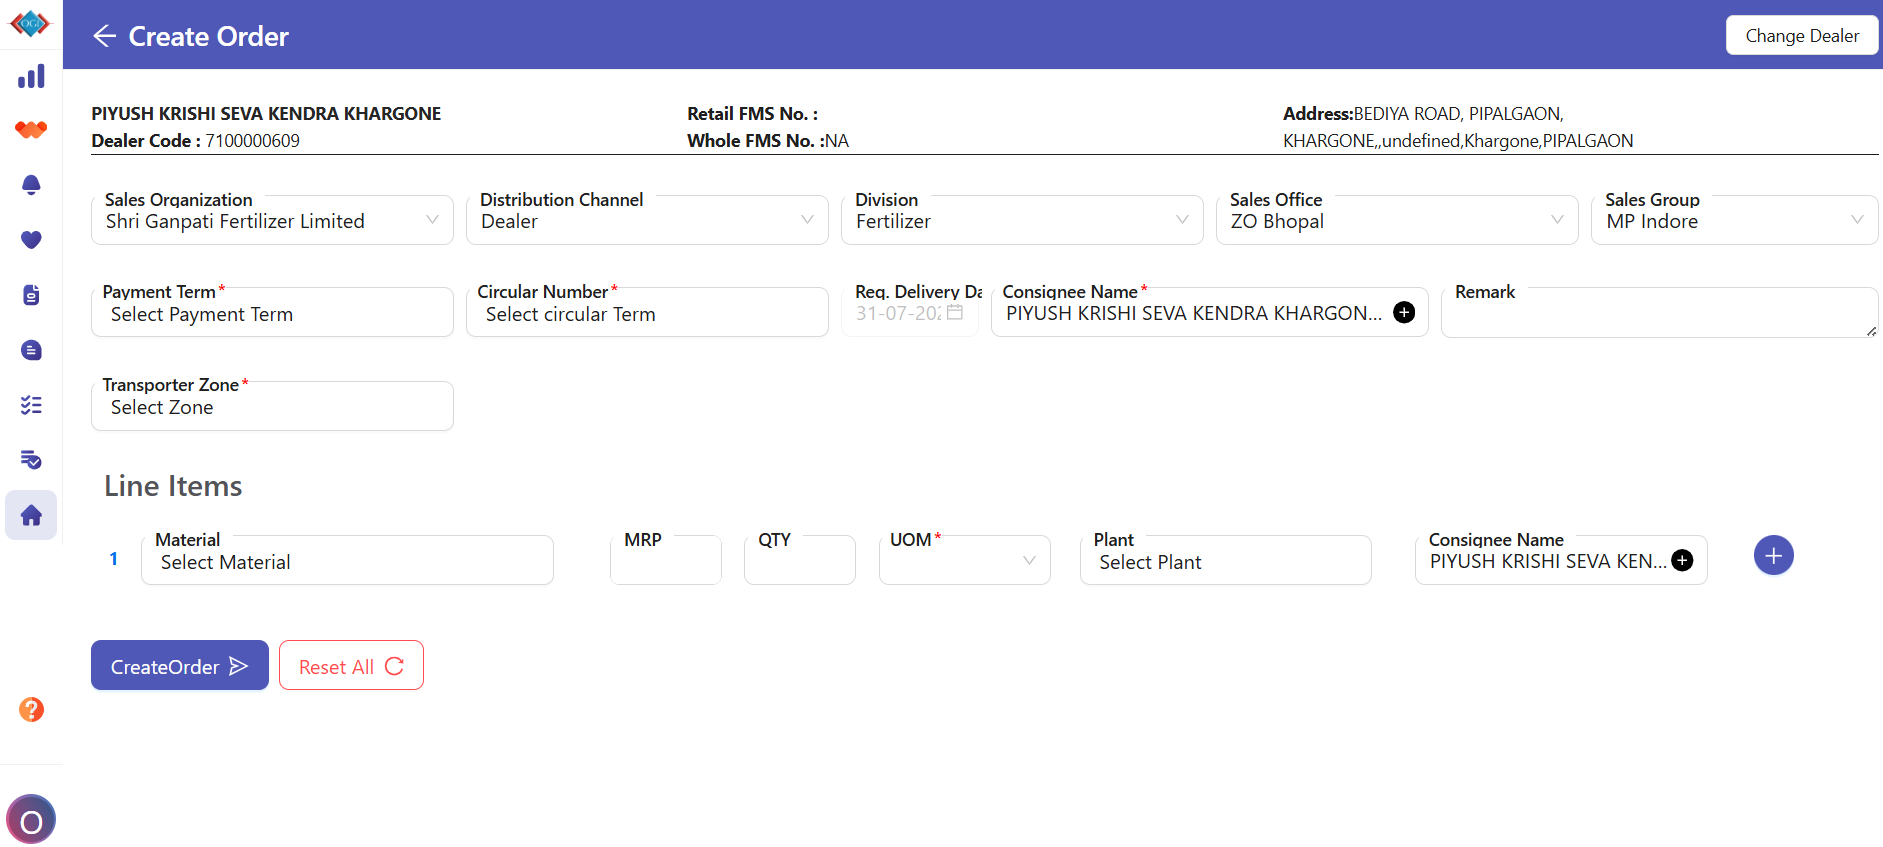
Create Order:
-
If Admin is going to create the order initially, it has to select the dealer and then fill in the rest of the details.
-
And if the dealer is going to create the order, then by default the fields are autofilled.
-
After that, select the Material andthere is the validation if the MRP not set against the Material in SAP itwill not reflect on the portal.
-
If the required fields are not filled, then it will not be created.
Sales Order Approval:
-
Once the Order created it shows in the sales orderapproval screen.
-
Go to Order Information>> Sales Order Approval
-
Click on the Play Icon and Approve the Order
-
After Approval done, Select the Order and Click onthe Confirm Sales Order.
-
It triggered the SAP and SAP’s Sales Ordernumber will generated and shown on the Portal.
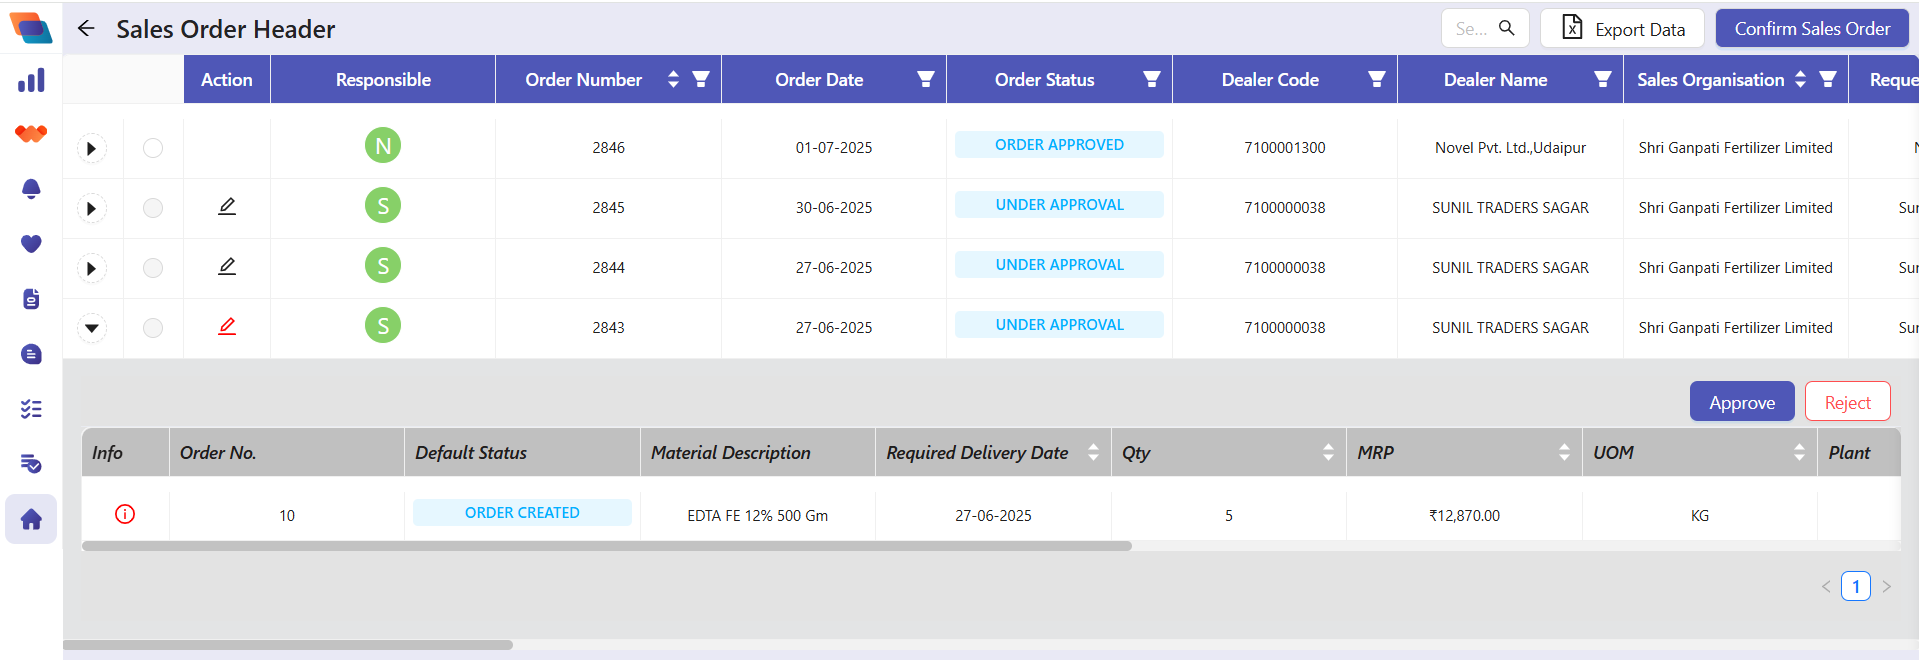
Sales Order Rejected:
-
And if the Order Rejected it shows the Order Rejected tile.
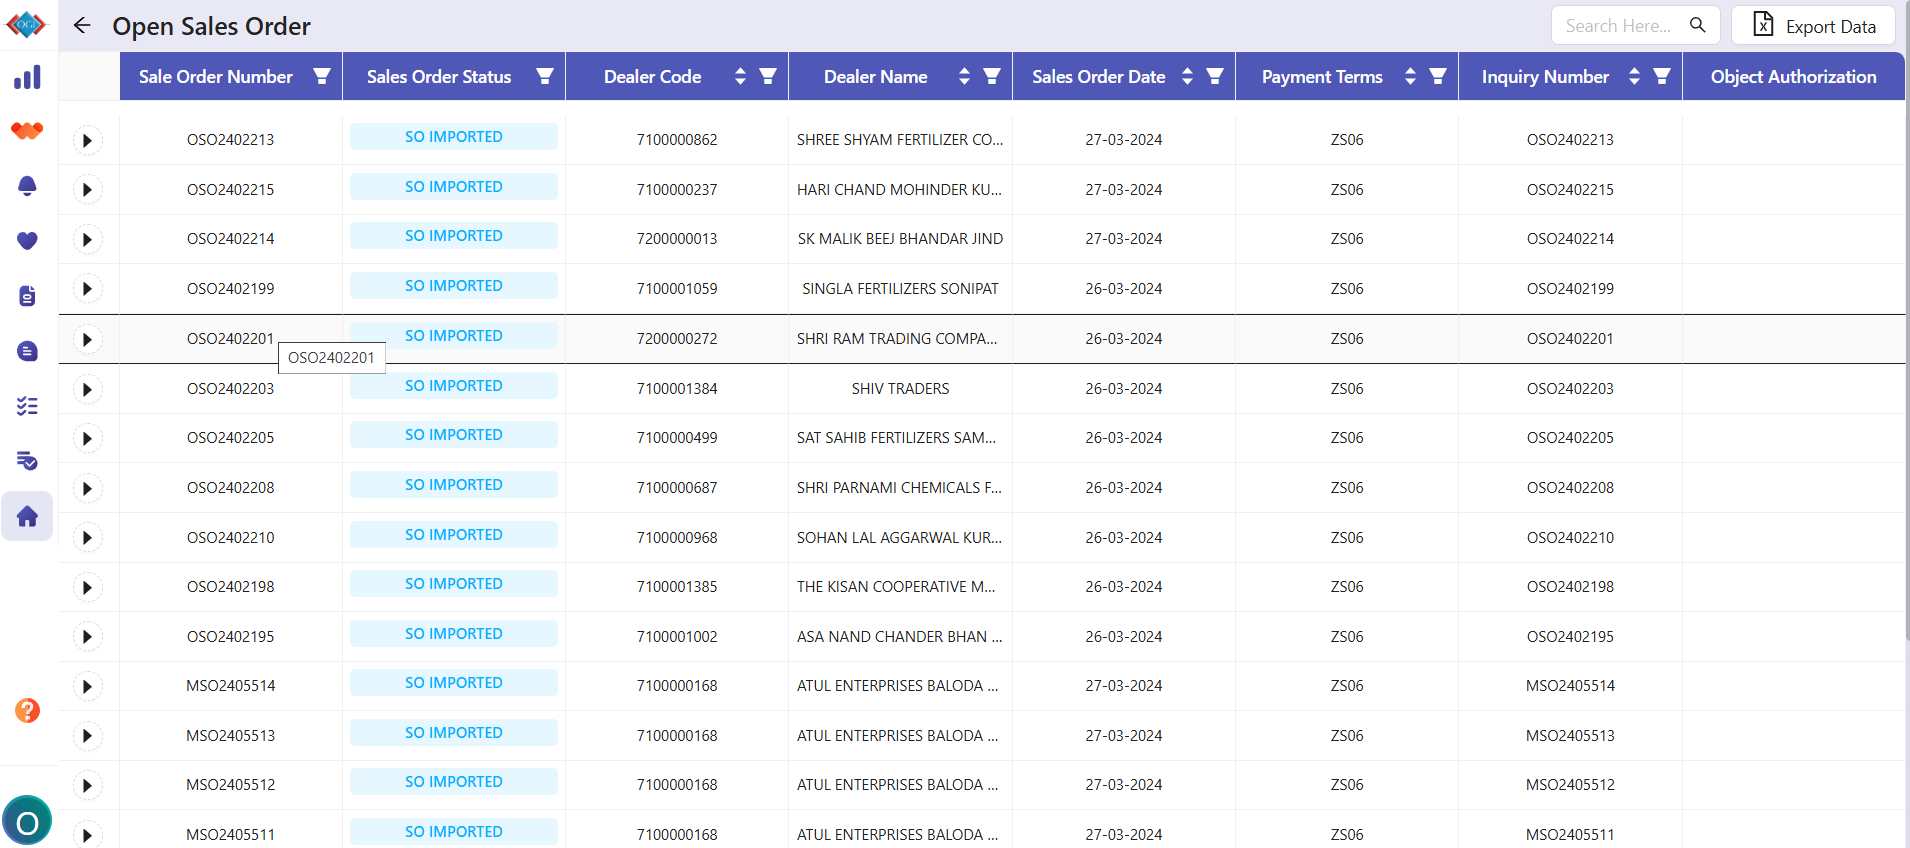
Open Sales Order:
-
This tile shows all the open sales orders for which Dispatch orInvoice generation or both are pending.

Completed Sales Order:
-
This tile show all theCompleted Sales Order whichDispatch and Invoice havebeen generated.
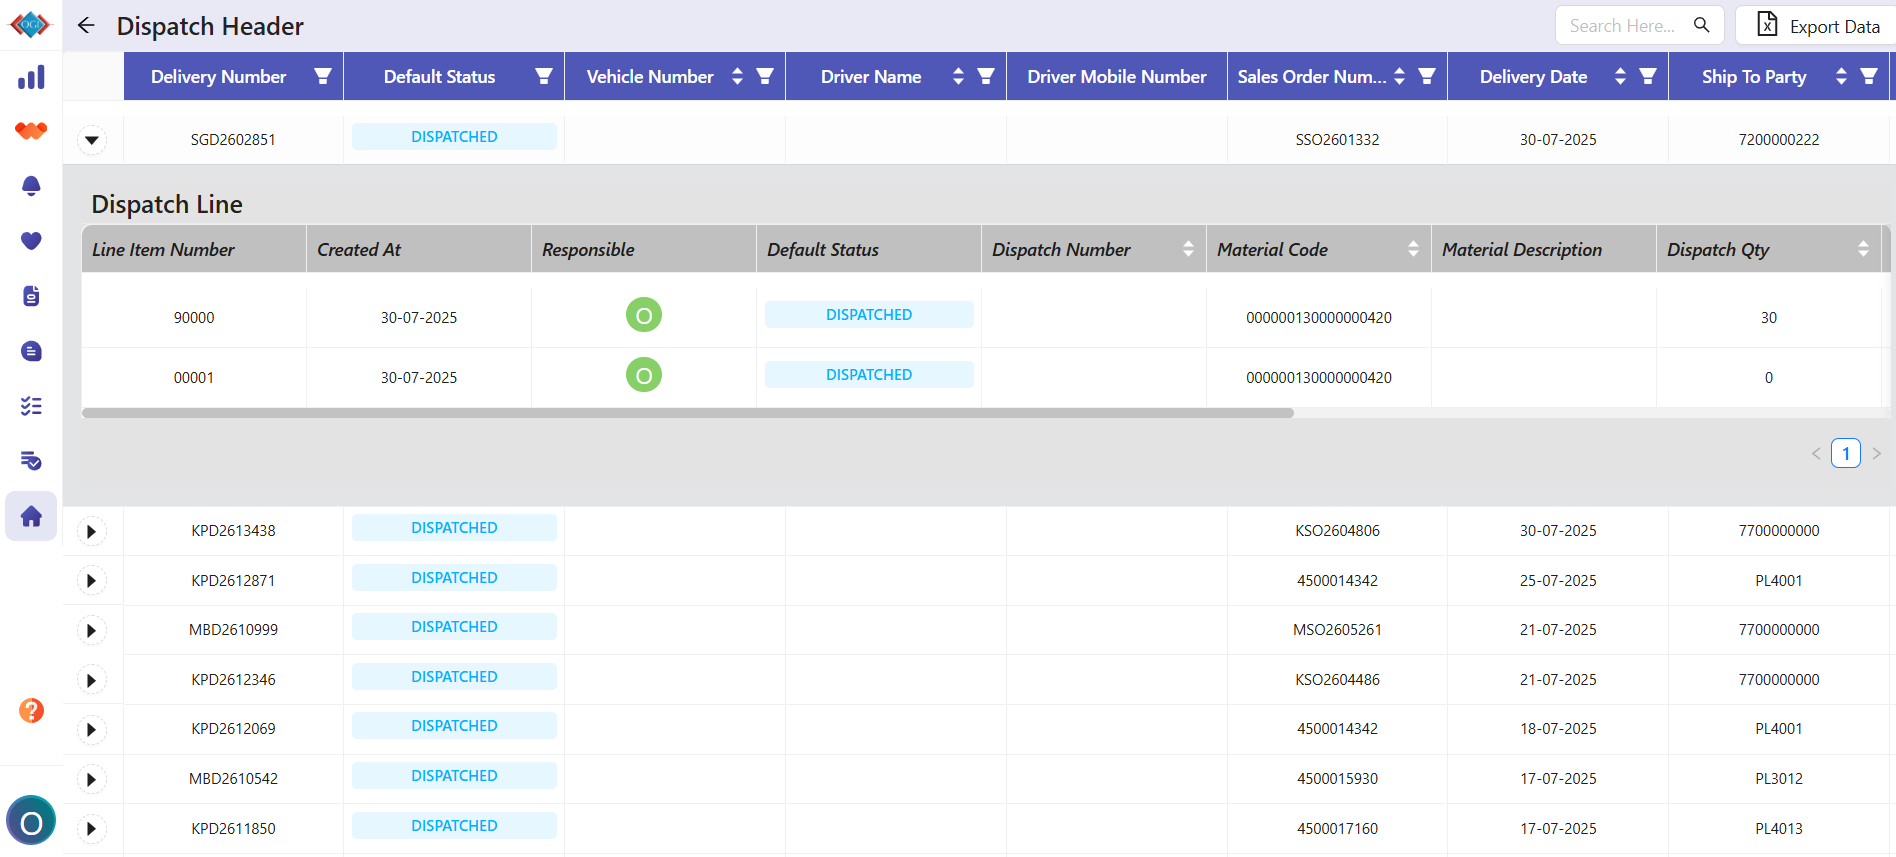
Dispatch.
Information:
-
Dispatch details can be checked by Admin and Dealer.
-
Admin can see all the data related toDispatch whereas the Dealer can see thedata related to his account.
-
Dispatch data fetched by SAP directly.
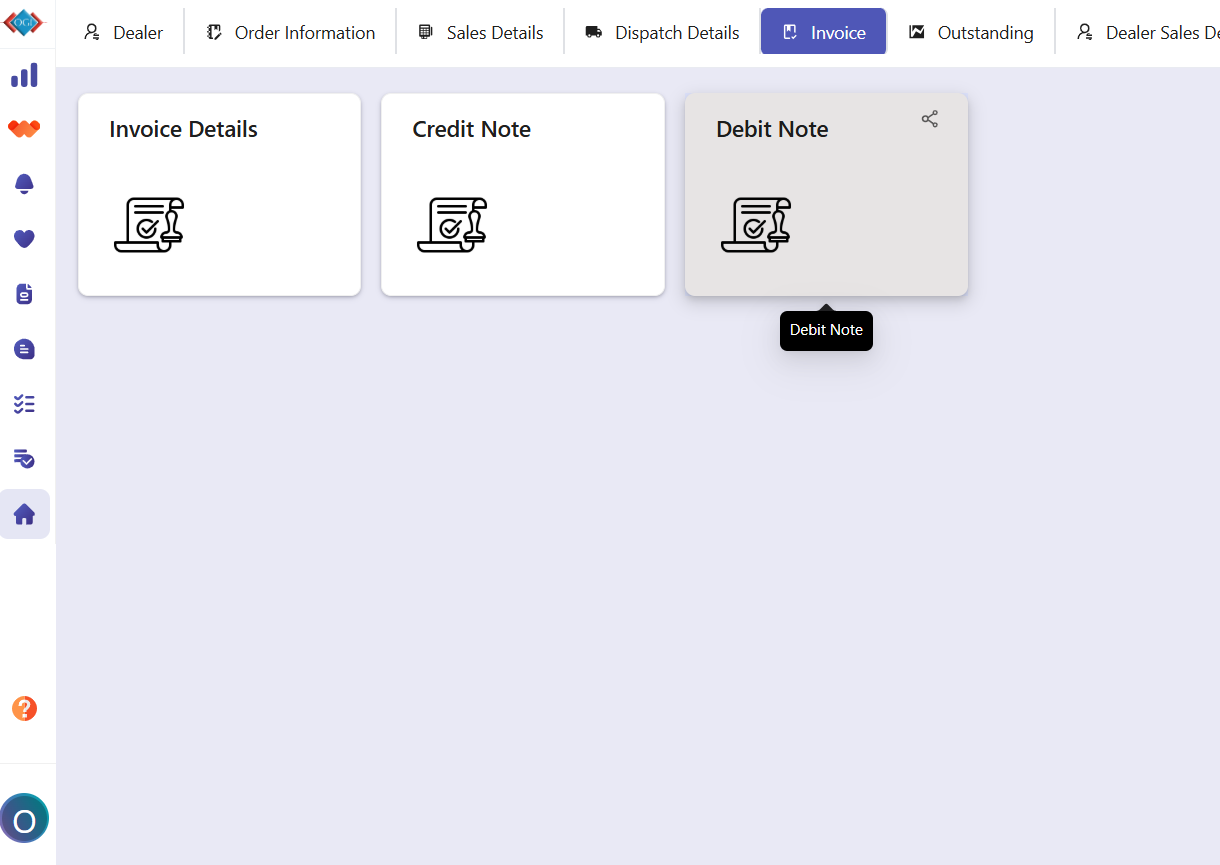
Invoice.
Information:
-
In the Invoice section, invoice details and the Credit Note and Debit Note name tiles areavailable.
-
These are accessible by both admin and dealer.
-
Admin has the access to see the complete invoice-related data of eachdealer.
-
Whereas the Dealer having access to only those invoice data that are related to their account.
Invoice Details:
-
Invoice Details shows the complete invoice details generated in SAP and theuser can download the Invoice, fromInvoice Attachment section.
-
Also, the user can download all the details in one click by clicking on Export Data.
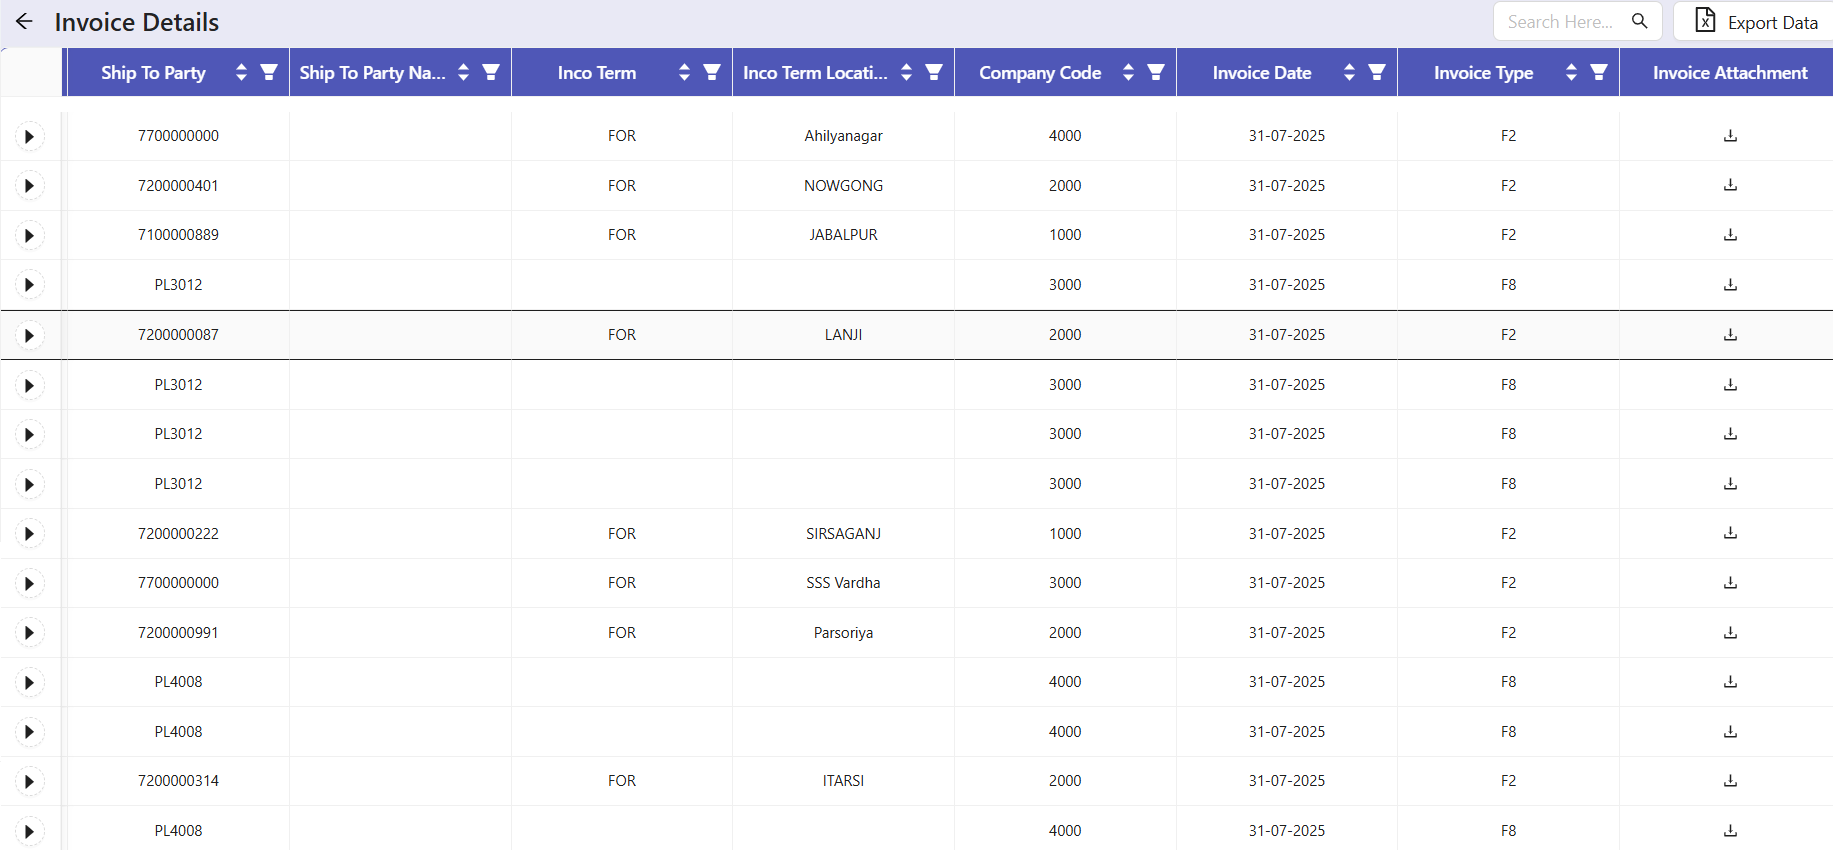
-
Invoice Details shows the complete invoice details generated in SAP and theuser can download the Invoice, fromInvoice Attachment section.
-
Also, the user can download all the details in one click by clicking on Export Data.
-
Similarly, in the credit note and debit note, the user can check the details and the invoice, respectively.

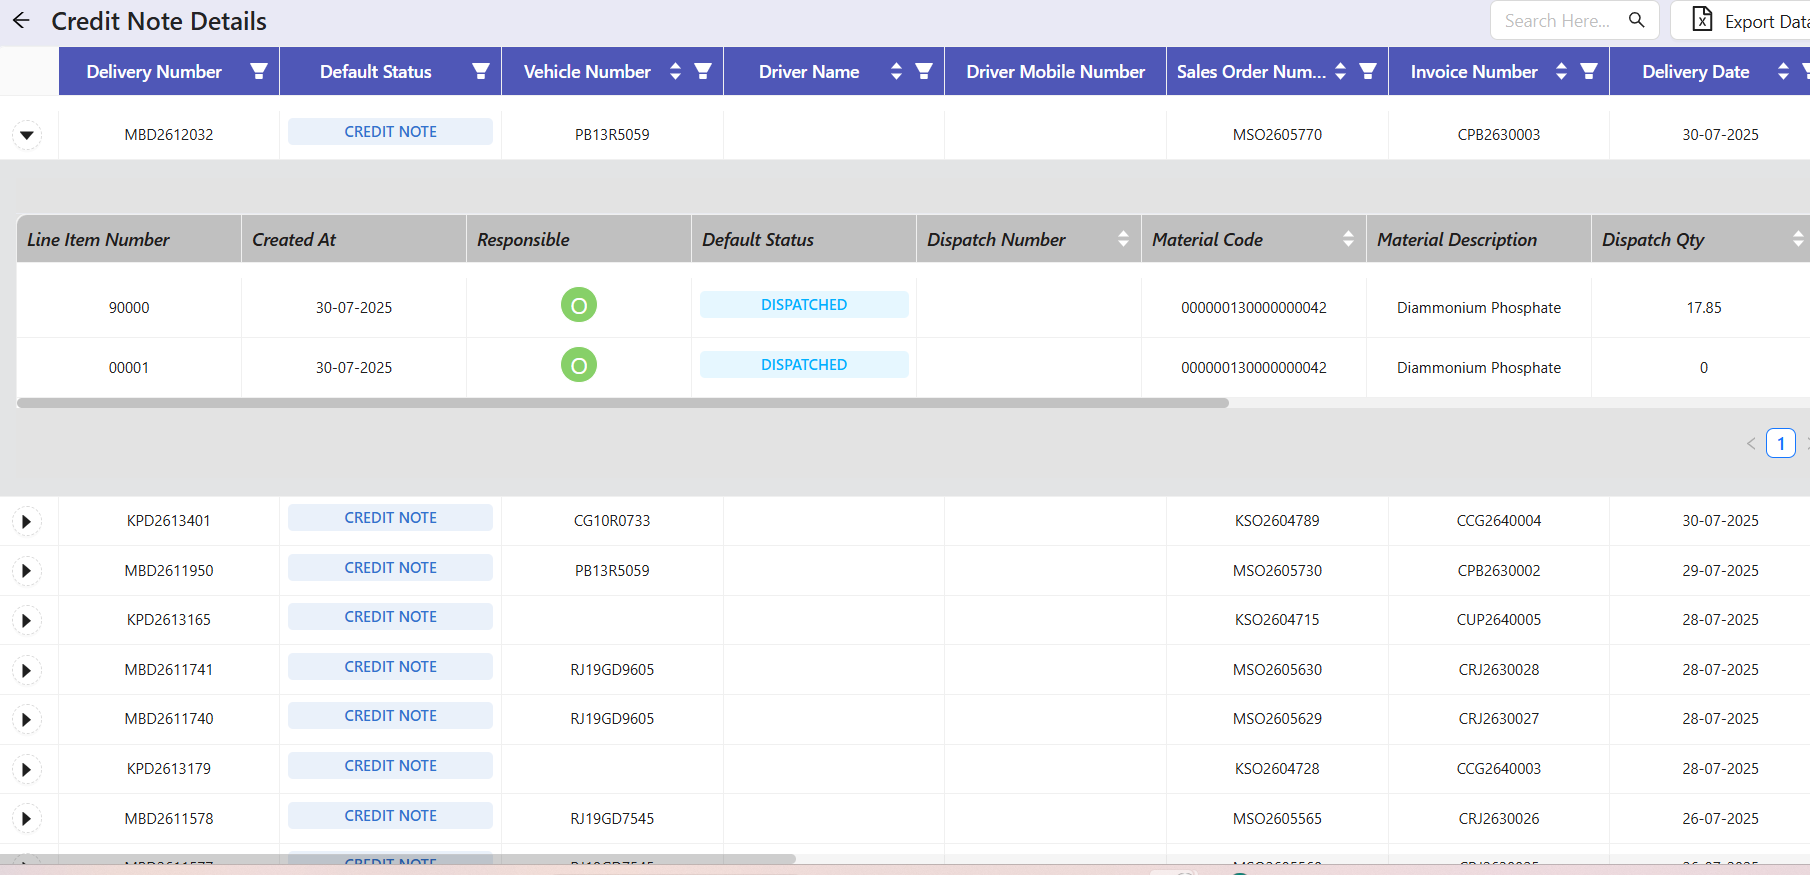
Credit Note:
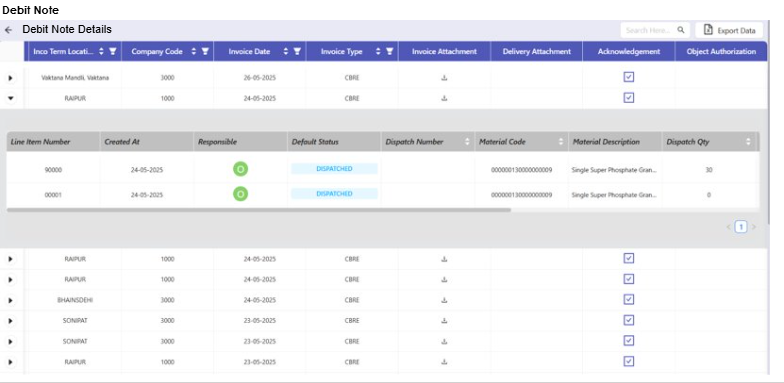
Debit Note:
Outstanding.
Information:
-
Outstanding refers to the check dealer's statement and Ledgers
-
Only the admin has access to the particular tile.
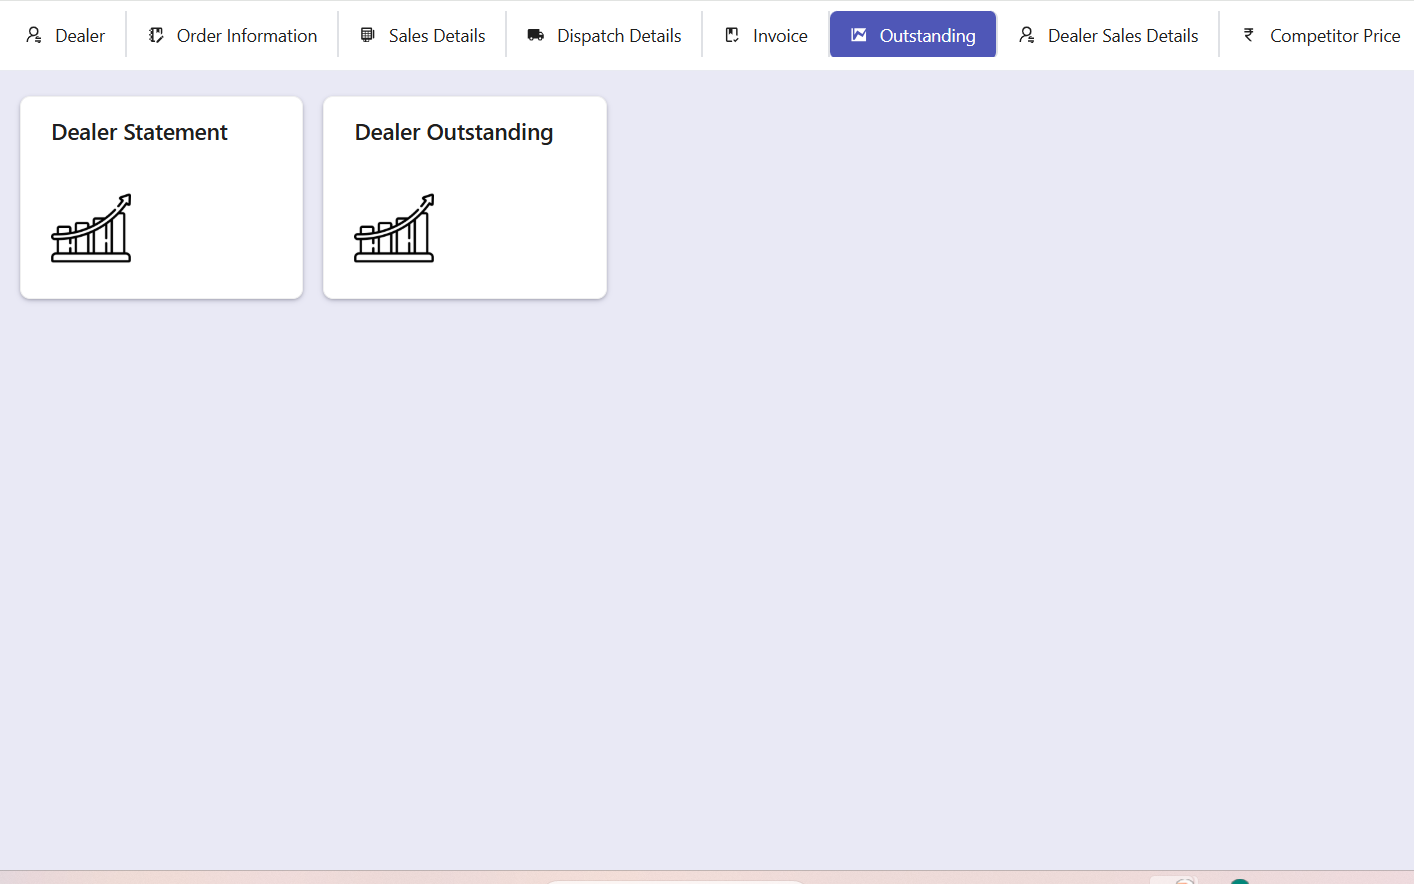
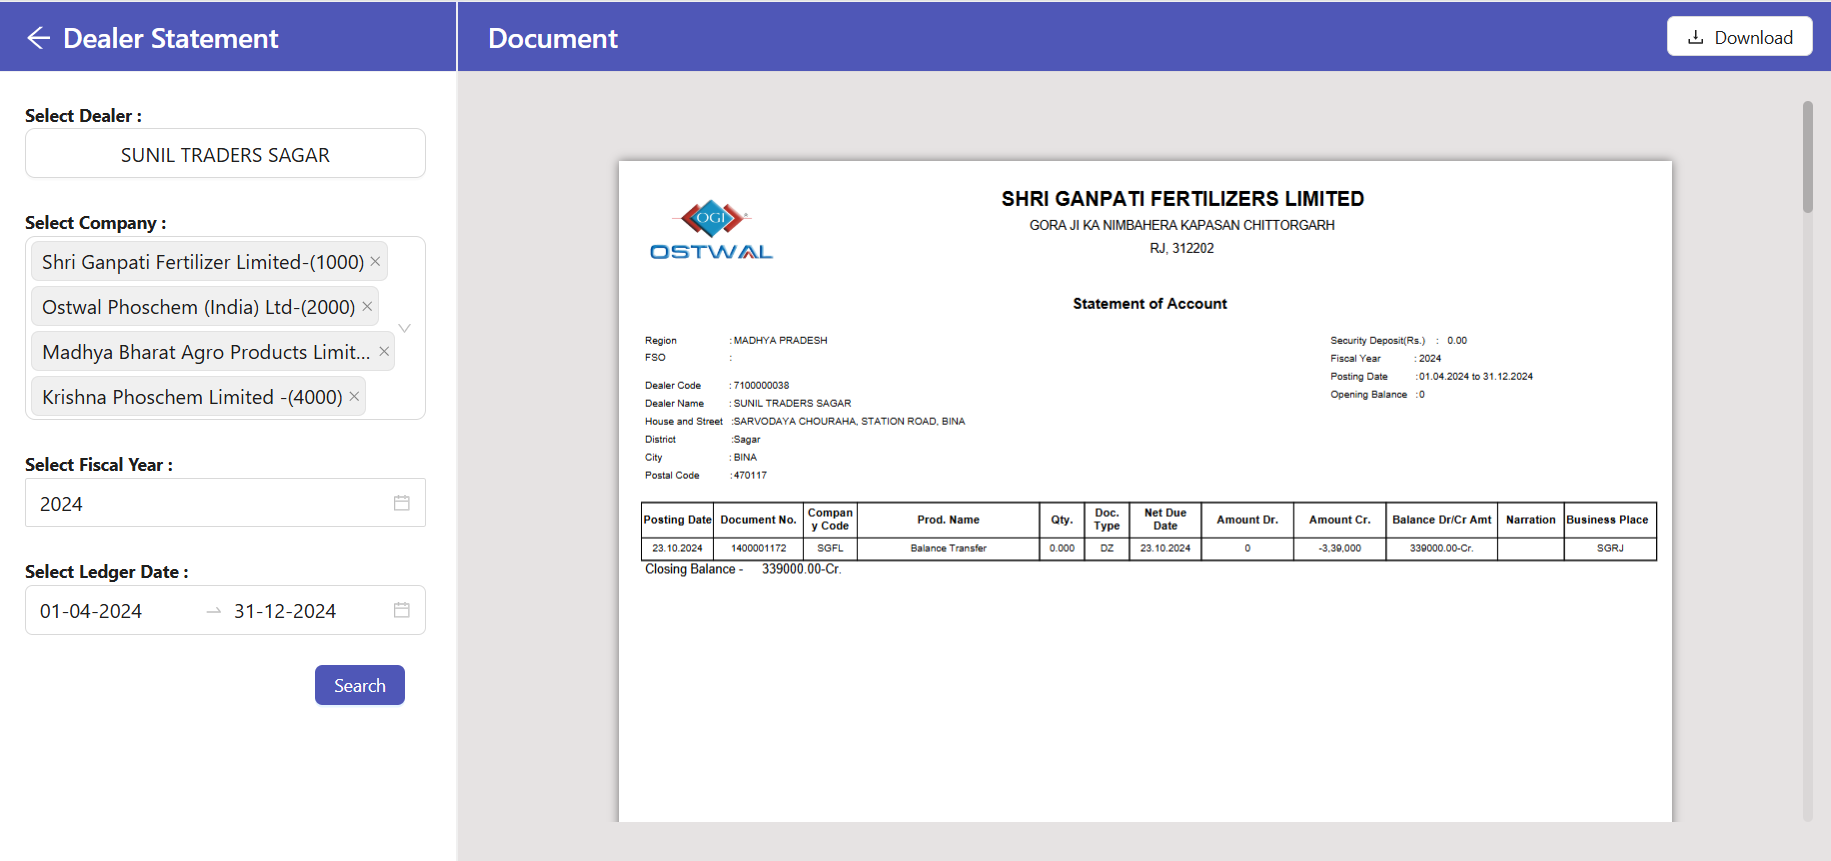
Dealer Statement:
-
Select the Dealer. Select the Company Name, Select the Fiscal Year, and select the Ledger Date.
-
The Ledger date should selected of thegiven fiscal year form 1 April to 31March
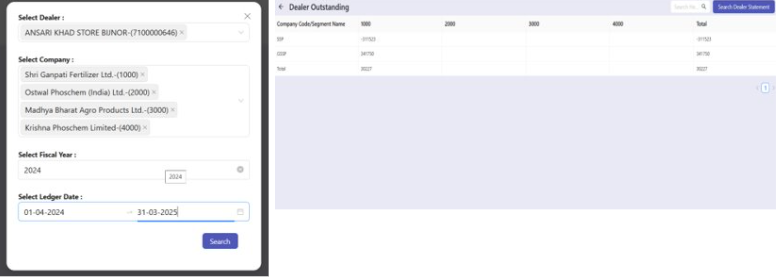
Dealer Outstanding:
-
Select the Dealer, Select the Company name, Select the Fiscal Year, and Select the Ledger Date.
-
The Ledger date should selected of the given fiscal year form 1 April to 31 March
Secondary Sales Details:
